One of the central questions of our new customers is, how to optimize Recolize Recommendations in their daily business, to get a better performance? As Recolize offers a totally different approach compared to competitors to integrate recommendation widgets into a page, the analysis of the recommendations also differs from fixed positioned widgets.
The Recolize Difference
In the Recolize Tool you are very flexible to define your recommendation widget positions based on existing CSS elements on your website. So you are free to integrate the recommendations without any developer resources, for every landing page etc. Furthermore you define your recommendation rules completely URL based and not widget based.
Flexible Widget Positions Through CSS Selectors
Let’s make an example from our Magento 2 demo system:
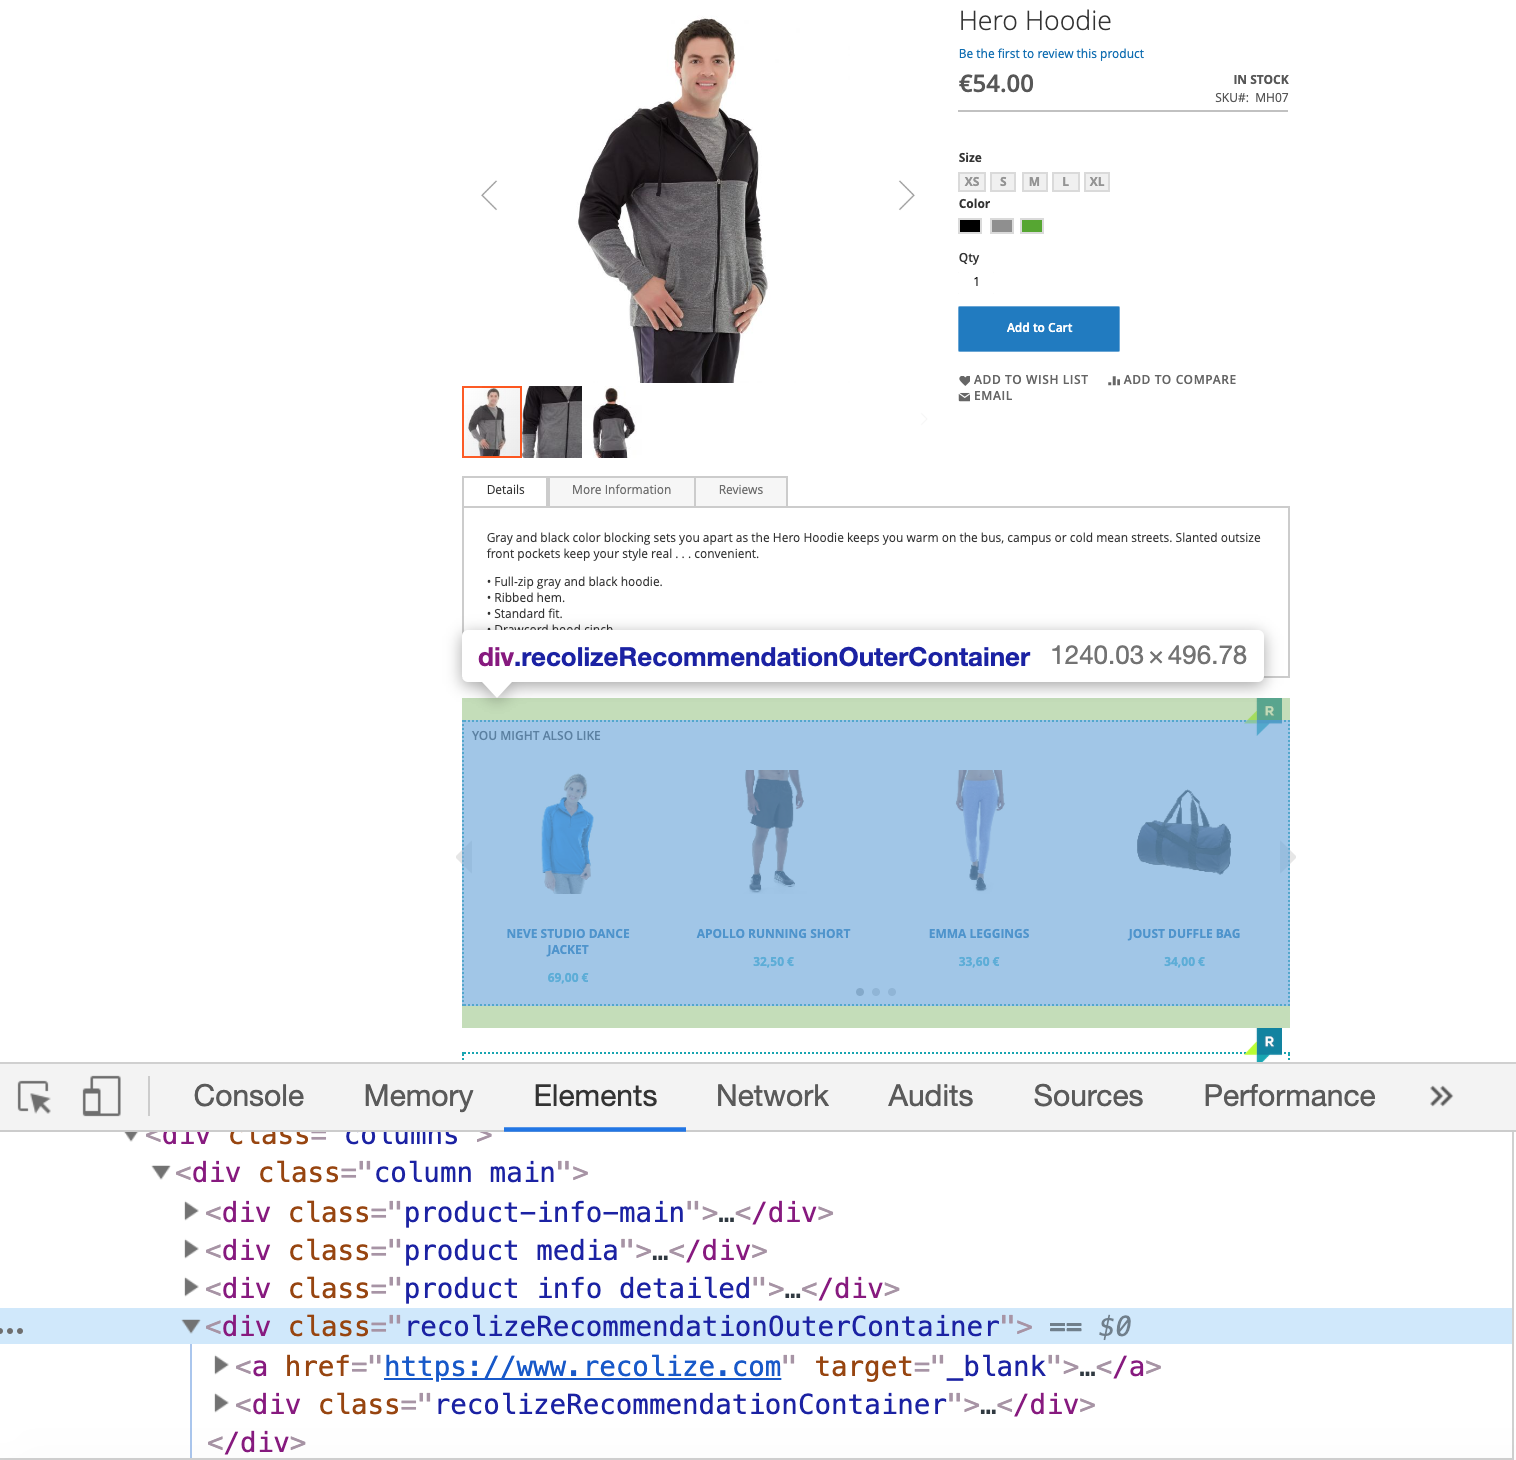
The Recolize widget in this case of a product page is defined as:
.product.info.detailed:after
This CSS selector simple means: display a Recolize widget on every page which has the element .product.info.detailed after this specific element. So you are free to use every existing CSS element on your website. Anytime, very flexible, as many widgets as you want per page and the widgets are displayed instantly.
URL Based Rules for Very Specific Recommendations
In difference to other less flexible systems, in Recolize you define your recommendation rules URL based. As there can be multiple widgets on a single page, you define the URL and the position of the widget as base for the rule. For determining the position, you simple count through the displayed recommendation widgets from top to bottom.
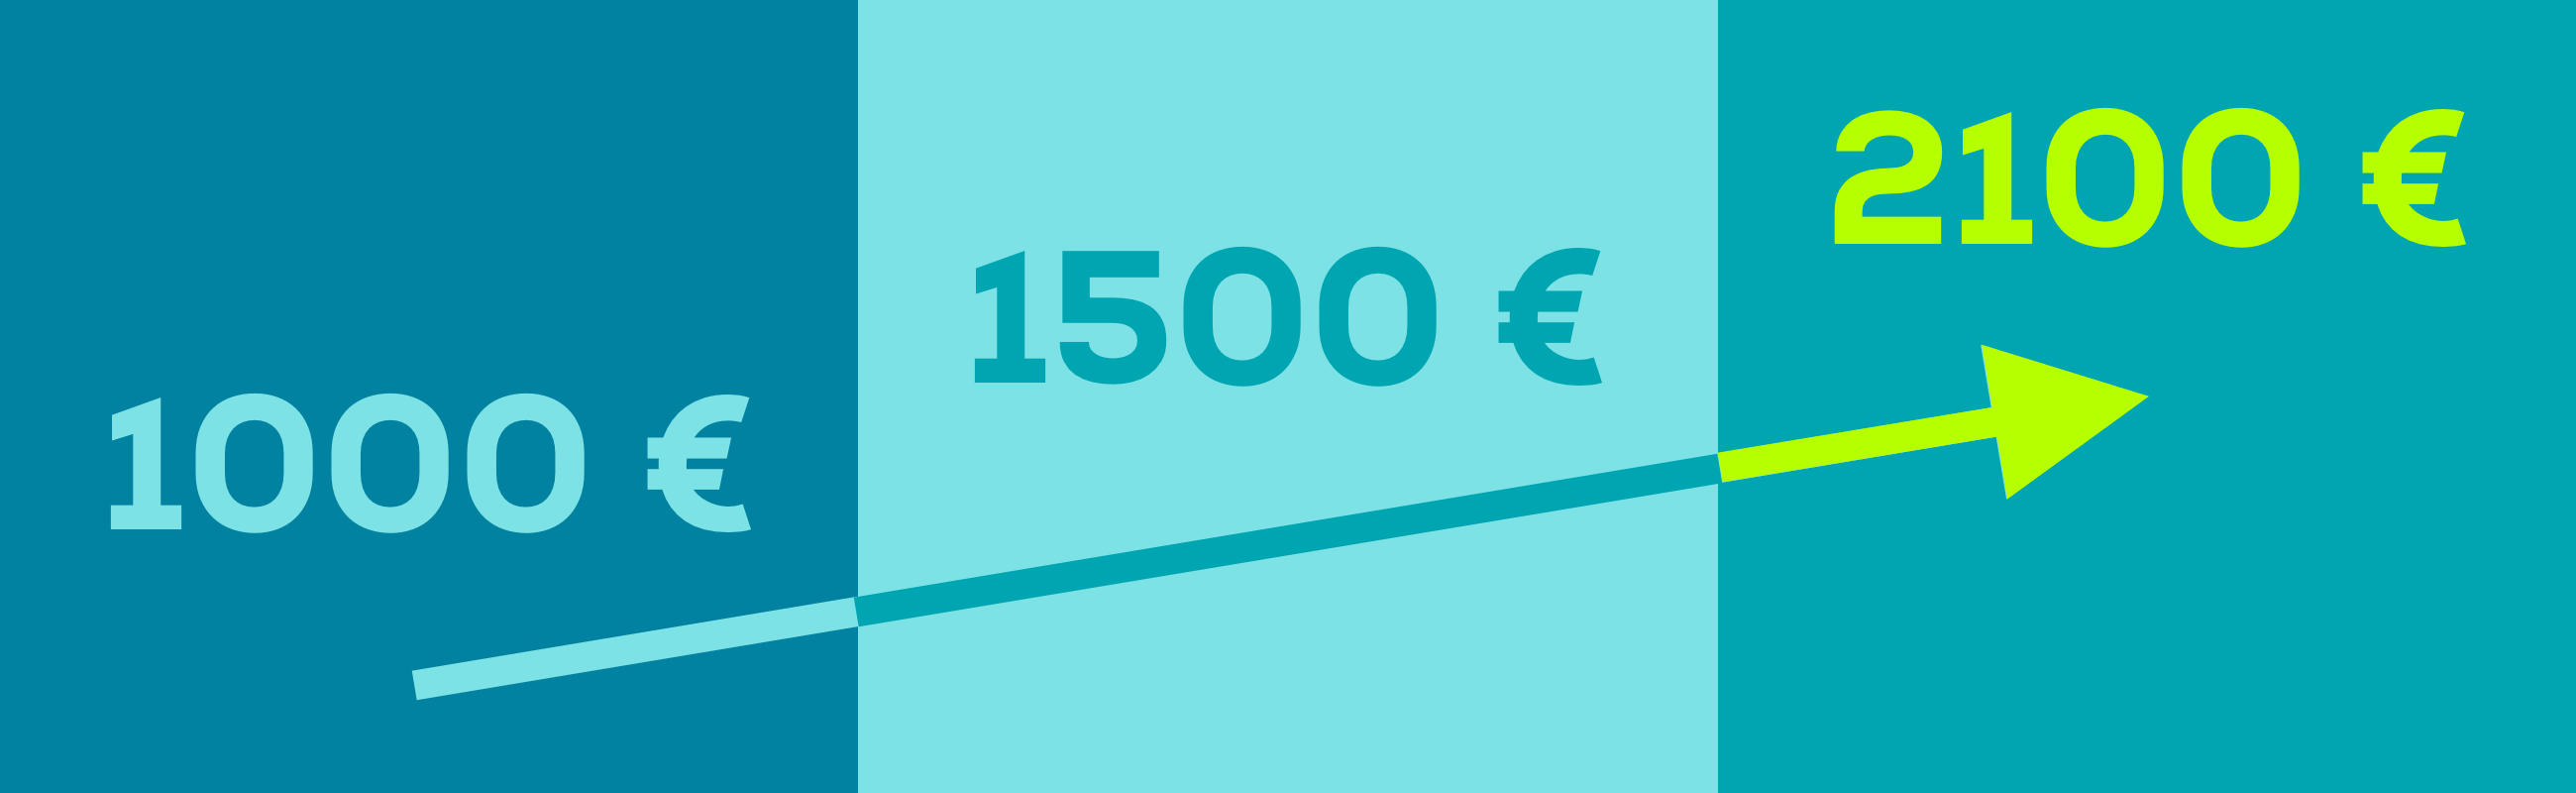
We’ve decided to offer URL based recommendation rules, because marketeers work with URLs in all performance marketing channels to generate traffic to a website and we want to improve the conversion of this traffic onsite also URL based to make it easier. Therefore it is e.g. possible to display different recommendations based on a campaign parameter in an URL.
E.g. the URL
http://demo.magento2.recolize.com/hero-hoodie.html?utm_campaign=Blue Jeans
can then display different recommendations in the same widget/position, based on the utm_campaign parameter compared to the URL
http://demo.magento2.recolize.com/hero-hoodie.html
without a campaign parameter.
1. Integrate Your First Widgets
The first step after you start with Recolize is to define the CSS selectors to display recommendation widgets on your website. The CSS selector system was described above.
It’s much better to start with several widgets than to start with only a single widget on e.g. product pages. Many customers tend to start small and extend later. But you will get much more relevant results for your analysis, if you use our USP to add as many widgets per page as you want to.
2. Define the Cycle for the Analysis
Very important for a reasonable analysis is to define a time cycle for the analysis. The cycle should mainly depend on the traffic of your website. Traffic either means unique users or page impressions.
Start with the following base cycle:
| wdt_ID | Traffic (Page Impressions) | Cycle (Days) |
|---|---|---|
| 1 | 10.000 | 60 |
| 2 | 50.000 | 50 |
| 3 | 100.000 | 40 |
| 4 | 200.000 | 30 |
| 5 | 500.000 | 21 |
| 6 | 1.000.000 | 14 |
| 7 | 5.000.000 | 7 |
3. The Steps of an Analysis in the Recolize Tool
a) KPI Overview in the Recolize Dashboard
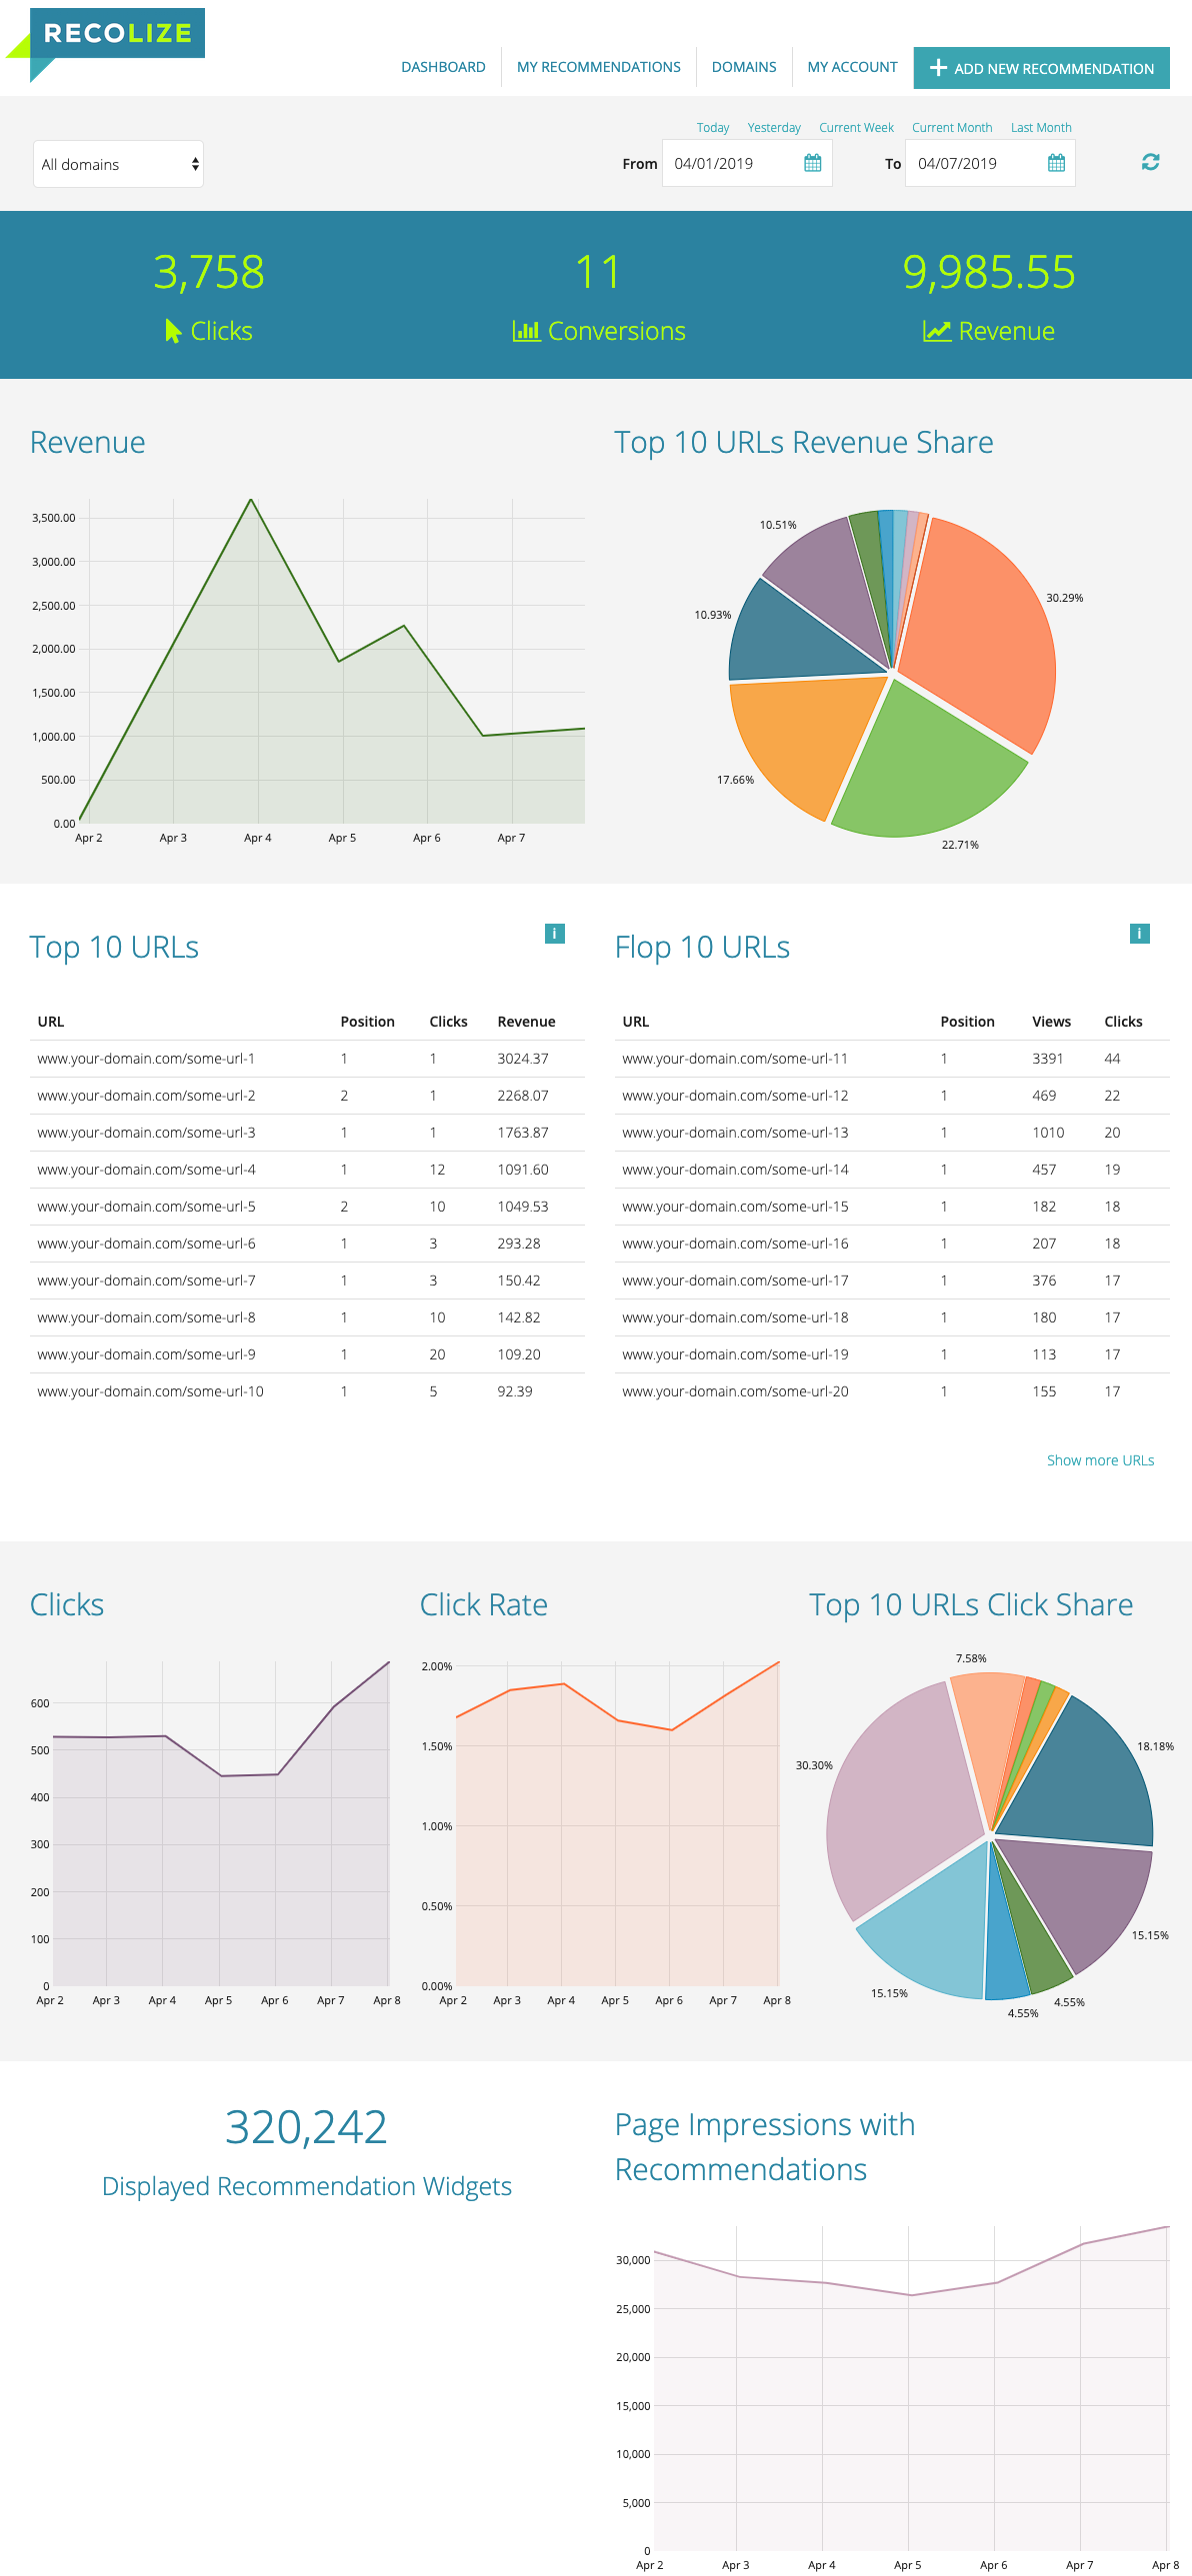
In the Recolize Dashboard you can freely choose a time frame (in the example above 2019/04/01 until 2019/04/07) and then analyze the following KPIs in realtime:
- Clicks: clicks on recommendations.
- Conversions: number of direct Recolize conversions (only direct conversions of a previously clicked recommendation are counted).
- Revenue: revenue of direct Recolize conversions (only direct conversions of a previously clicked recommendation are counted).
- Revenue chart: daily revenue.
- Top 10 URLs revenue: your top 10 urls which generated the most revenue.
- Top URLs: your top 10 URLs based on revenue, clicks and recommendation views. Click on an URL to see details.
- Flop URLs: your worst 10 URLs based on revenue, clicks and recommendation views. Click on an URL to see details.
- Clicks: daily clicks.
- Click Rate: daily click rate on recommendations.
- Top 10 URLs Click Share: the click share of your top 10 URLs.
- The number of displayed recommendation widgets.
- Page Impressions with Recommendations: every page impression which displayed one or more recommendation widget is counted.
b) Drill Down the Selected Time Frame
After you’ve analyzed the overview of your recommendations, then change the time frame in the Recolize Tool to analyze your KPIs deeper. E.g. switch to single days when a special sales activity took place. Every chart in the Recolize will then display the numbers hourly.
4. Analyze Specific URLs
If you want to analyze one specific URL, then just click on it in the Top 10 or Flop 10 URLs. If your URL is not listed there, then use the link “Show more URLs” under the Flop URLs, search for your url and then click on it.
After you’ve clicked on the URL, you’ll be displayed the URL Details view for the selected time frame:

You can then analyze the following details:
- Keyfacts, Recommended Actions, Expectations: our Customer Intelligence Tool gives you hints for improving your recommendations. In this image the URL is contained in the top 100 URLs and no changes are needed to improve the recommendations for this specific URL.
- The revenue share of this URL compared to the total revenue of all recommendations.
- Top 10 products: based on your product IDs.
- The number of clicks on a recommendation under this URL.
- The number of recommendation views under this URL.
5. Create a New Recommendation Rule
After you’ve analyzed your recommendations, you can decide to optimize your recommendation rules to improve the performance of the recommendations.
Therefore click on the button “Add New Recommendation” on the right upper corner if the Recolize Tool. On the URL Detail view you click on “Create New Recommendation for this URL” and the URL field in the recommendation configuration form will be pre-set.
After that define rules which in your opinion improve the performance of your recommendations. Also think of the recommended actions in the URL Detail view, which can help you with some basic recommendations for your rules.
In the next analysis cycle you should then:
- Compare the previous timeframe’s overall performance to the most current cycle to find out, if your new rule has improved the performance.
- Compare the most important, best and worst performing URLs in both timeframes to find out, which influence your new rule had on the performance of these URLs.
- Ideally exclude other influence factors like additional campaign activities to have a statistically relevant comparison.
- Decide, if you need further rule changes or maybe also additional rules for specific target groups or other contexts.
6. Analyze Page Types
Recolize is planning to integrate the analysis of page types by using the same URL wildcards which you can select in the Recolize rules. You can then e.g. analyze all widgets on a product page by filtering “ALL_ITEM_DETAIL_PAGES” in the URLs.
This feature will be available in Q3 2019.
7. Integration of External Tracking Tools
Most of our customers are using Google Analytics, but also other usertracking tools like Econda, Adobe Analytics etc. If you want to start e.g. an onsite campaign or trigger an event tracking after a click on a recommendation, then we can integrate this for you. Please just write the Recolize Team and we will add this to your Recolize Domain.
8. Ask the Recolize Team for Further Analysis
Some of our customers have special needs for the analysis and to optimize Recolize Recommendations. If you want us to support you, then we can schedule regular meetings to analyze and improve the performance of your recommendations regularly. This service is completely free for you. Please contact us here.

