
One of the key features of Recolize is flexibility:
- System independent: no matter if Magento 1, Magento 2, Drupal, TYPO3, WordPress, PrestaShop, Shopify or custom website. Visit also our integrations page for more information.
- Content independent: no matter if products, blog articles, CMS pages or news.
- Display everywhere: display as many widgets as you want to on every page you can think of. Easily configurable in the Recolize Tool.
For some systems we have standard plugins. But Recolize is also extremely easy integrable with Google Tag Manager.
Of course you can use this integration guide also for a direct integration into your website or into other tag managers.
Required Steps
1. Create a Recolize Account
Create a Recolize Account and add a Recolize Domain. Just follow the first two steps of our Quick Start Guide.
2. Integrate the Recolize JavaScript Snippet Globally
Create a custom HTML tag in Google Tag Manager for all pages. Then login to the Recolize Tool and go to Domains > Edit, copy the Recolize JavaScript Snippet and add it as content to the new tag.
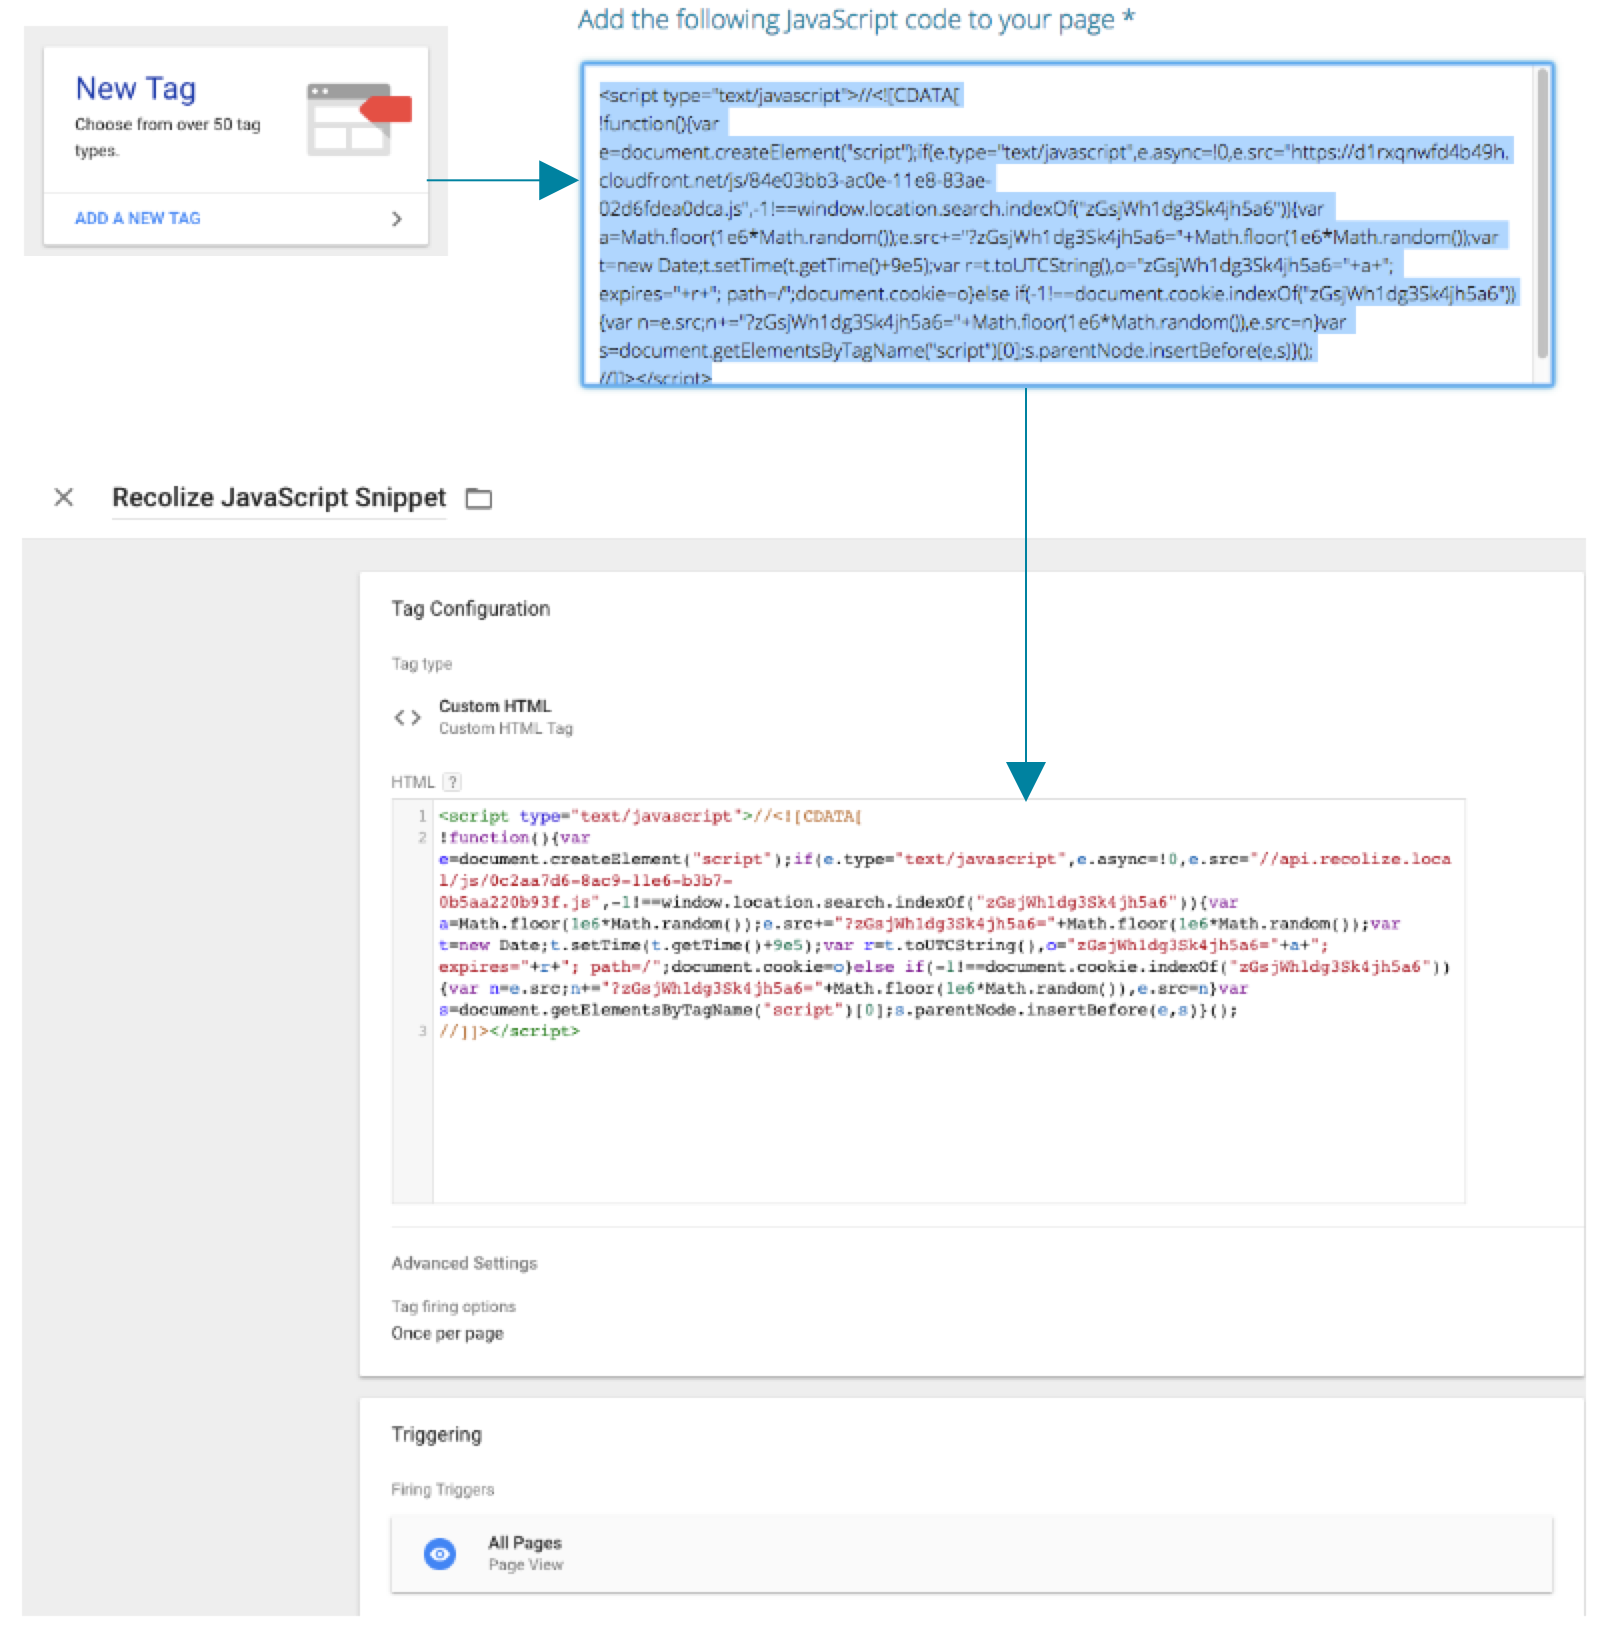
- Tag type: Custom HTML.
- Trigger: a page view on all pages.
- Fire: always and once per page.
This is already the whole basic integration. When you now publish this tag in Google Tag Manager, then Recolize will already be active on your website and recommendations can be displayed.
Additional Tags
In the following you can find recommended, optional und advanced integration steps. All the following tags have to fire before the Recolize JavaScript Snippet. Therefore add a tag sequencing rule to every following tag:

Recommended Steps
Integration of the Recolize Conversion Tracking
To measure the success of your recommendations, you should integrate the Recolize Conversion Tracking. This step is not mandatory, you can start with the basic integration mentioned above in the required integration steps, but it is recommended.
In online shops you add the conversion tracking to your checkout success page. For websites like blogs, CMS pages, company websites or news pages, the conversion tracking should be triggered after a specific visiting time on the page. Please decide which revenue value the conversion tracking should get in this case. You can of course also pass “0” as value, then the conversions are only counted without a monetary value.
You can find a complete description of the Recolize Conversion Tracking integration here.
<script type="text/javascript">
    var RecolizeParameters = RecolizeParameters || {};
    RecolizeParameters['itemAction'] = 'sale';
    RecolizeParameters['saleData'] = {};

    for (orderPosition in {{orderPositions}}) {
        RecolizeParameters['saleData'][{{orderPositions}}[orderPosition][{{itemId}}]] = parseFloat({{orderPositions}}[orderPosition]['netSum']);
    }
</script>
- Tag type: Custom HTML.
- Trigger: with every conversion in an online shop and after a specific visiting time on CMS, blogs and news pages.
- Variables
- {{itemId}}: replace this variable with the converted item, content or product ID variable. This must be the same item ID which you also use in the Recolize feed.
- netSum: float value. Contains the converted revenue with this item. In online shops this is the quantity multiplied with the net revenue. In other system you can define your conversion value or set “0”.
- Fire: before the global Recolize JavaScript Snippet.
Optional Steps
Add a Page Type for Product Detail Pages/Blog Posts/Item Detail Pages
To identify an item detail page and to use Recolize item context filters, cross-sells etc. and many more features, add the following JavaScript snippet to every product detail page, blog post page or item detail page:
<script type="text/javascript">
var RecolizeParameters = RecolizeParameters || {};
RecolizeParameters['specialPageType'] = 'item-detail';
RecolizeParameters['currentItemId'] = '{{itemId}}';
</script>
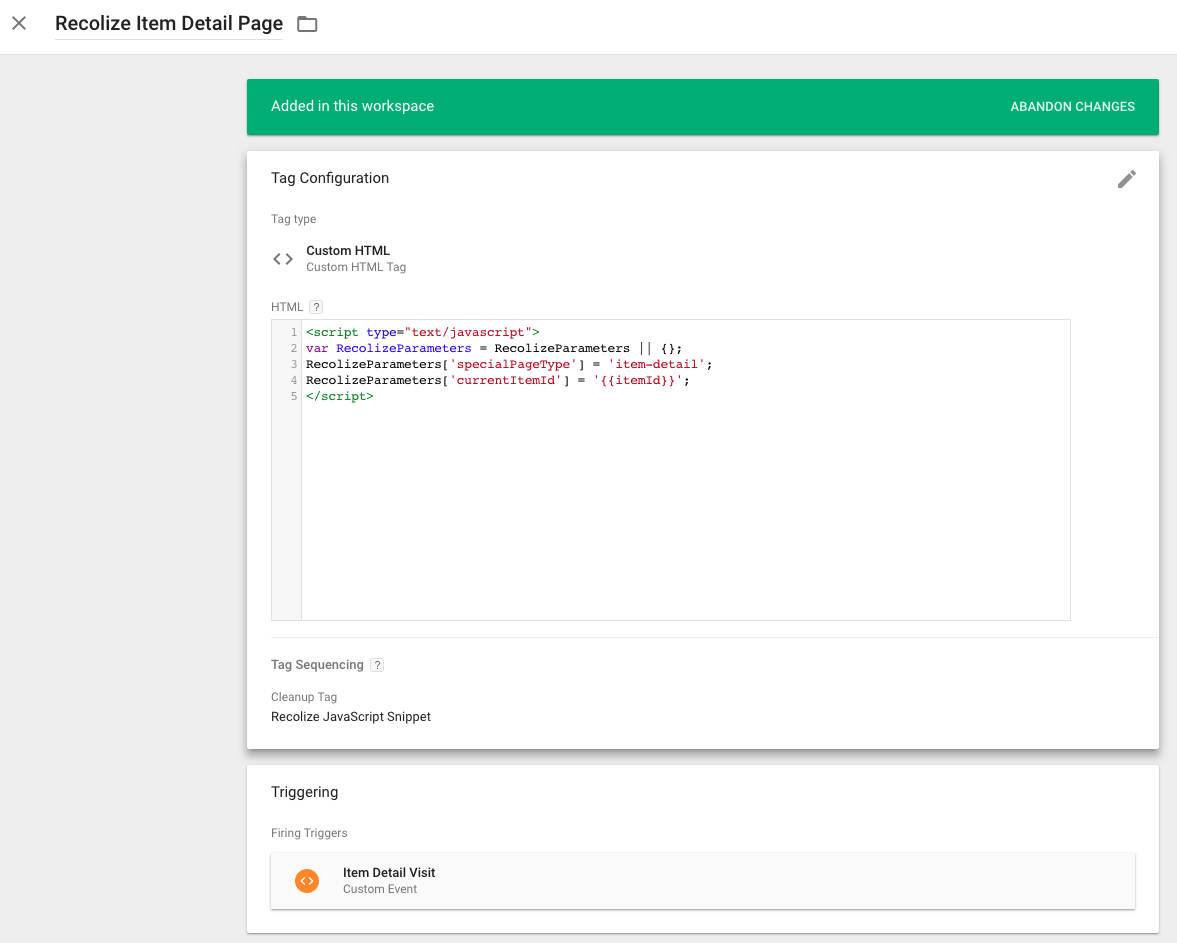
- Tag type: Custom HTML.
- Trigger: when the item detail page is visited.
- Variables: replace the variable {{itemId}} with your item, content or product ID variable. This must be the same item ID which you also use in the Recolize feed.
- Fire: before the global Recolize JavaScript Snippet.
Add a Page Type for Category Pages
To use Recolize category context filters and many more features, add the following JavaScript snippet to every category page:
<script type="text/javascript">
var RecolizeParameters = RecolizeParameters || {};
RecolizeParameters['specialPageType'] = 'category';
RecolizeParameters['categoryId'] = '{{categoryId}}';
</script>
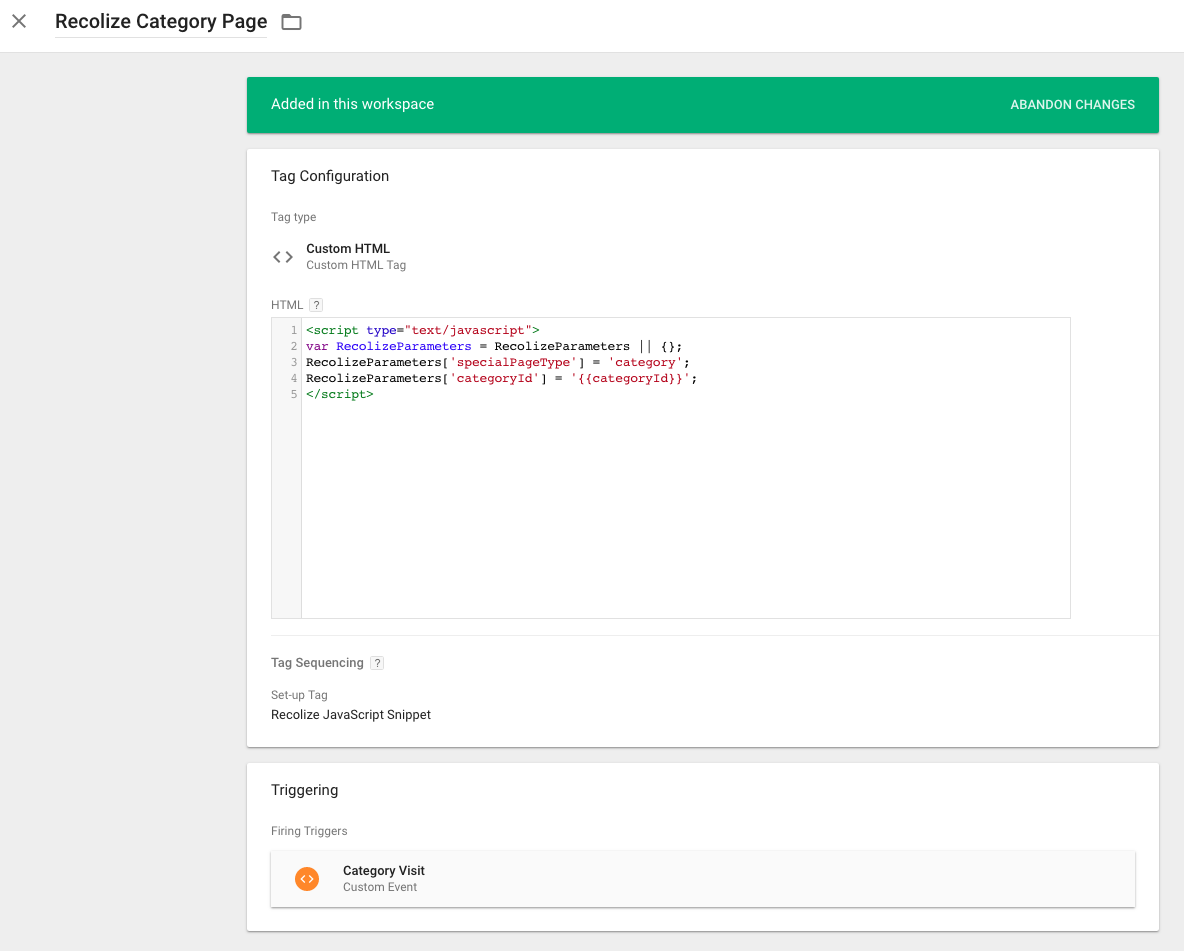
- Tag type: Custom HTML.
- Trigger: when a category page is visited.
- Variables: replace the variable {{categoryId}} with the category ID of the currently visited category page. This must be the same category ID which you also use in the Recolize feed.
- Fire: before the global Recolize JavaScript Snippet.
Track the Add to Cart Action
In shops this action can be fired when a product is added to the cart. For blogs, CMS pages or news you can trigger this action e.g. when a user likes the content.
<script type="text/javascript">
var RecolizeParameters = RecolizeParameters || {};
RecolizeParameters['itemAction'] = 'add_to_cart';
RecolizeParameters['clickedItemId'] = '{{itemId}}';
Recolize.Recommendation.Api.request();
</script>
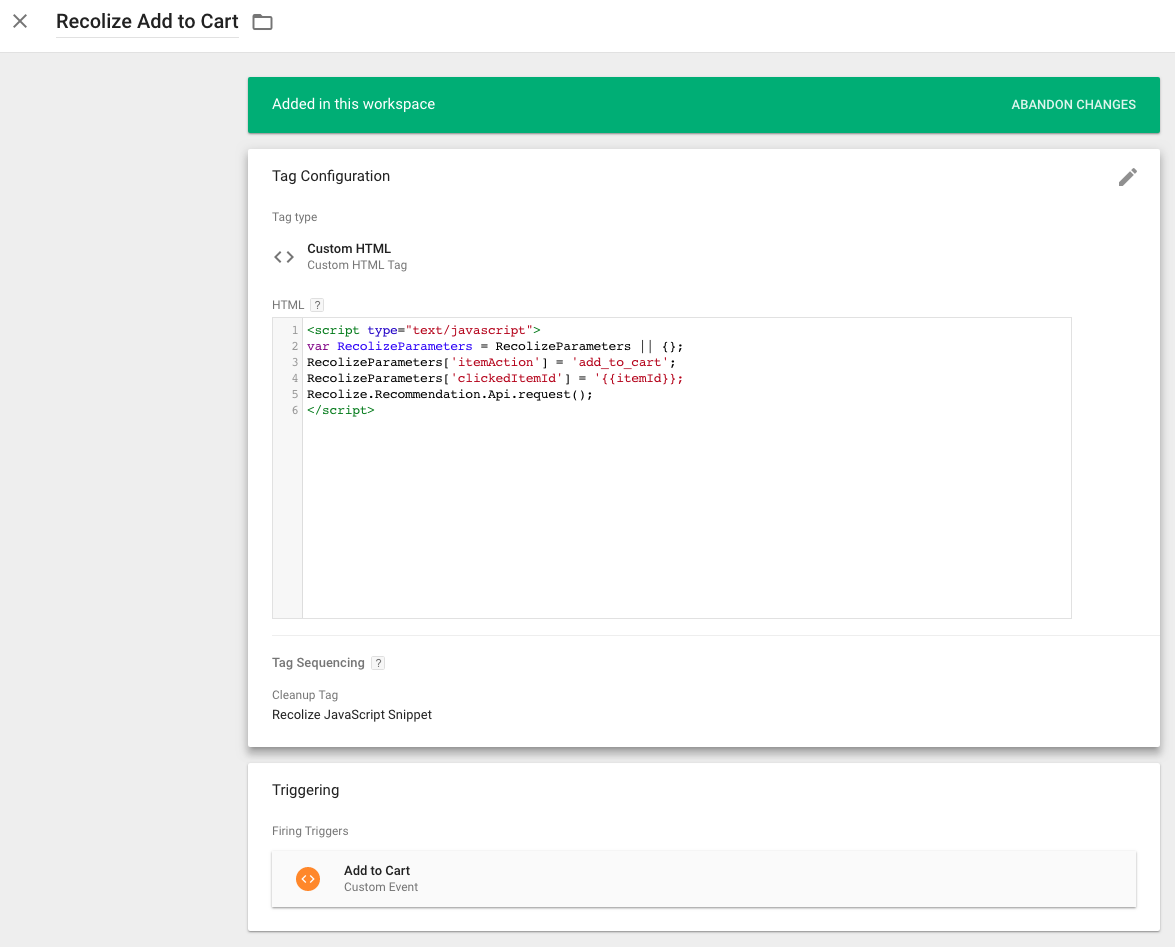
- Tag type: Custom HTML.
- Trigger: when a product is added to the cart or another content type is liked.
- Variables: replace the variable {{itemId}} with your product or item ID of the item added to the cart or liked. This must be the same item ID which you also use in the Recolize feed.
Track the Add to Wishlist Action
Add this action if your users have the possibility to add an item to a wishlist, a notepad, a reminder list or a reading list (e.g. for later reading of news articles).
<script type="text/javascript">
var RecolizeParameters = RecolizeParameters || {};
RecolizeParameters['itemAction'] = 'add_to_wishlist';
RecolizeParameters['clickedItemId'] = '{{itemId}}';
Recolize.Recommendation.Api.request();
</script>
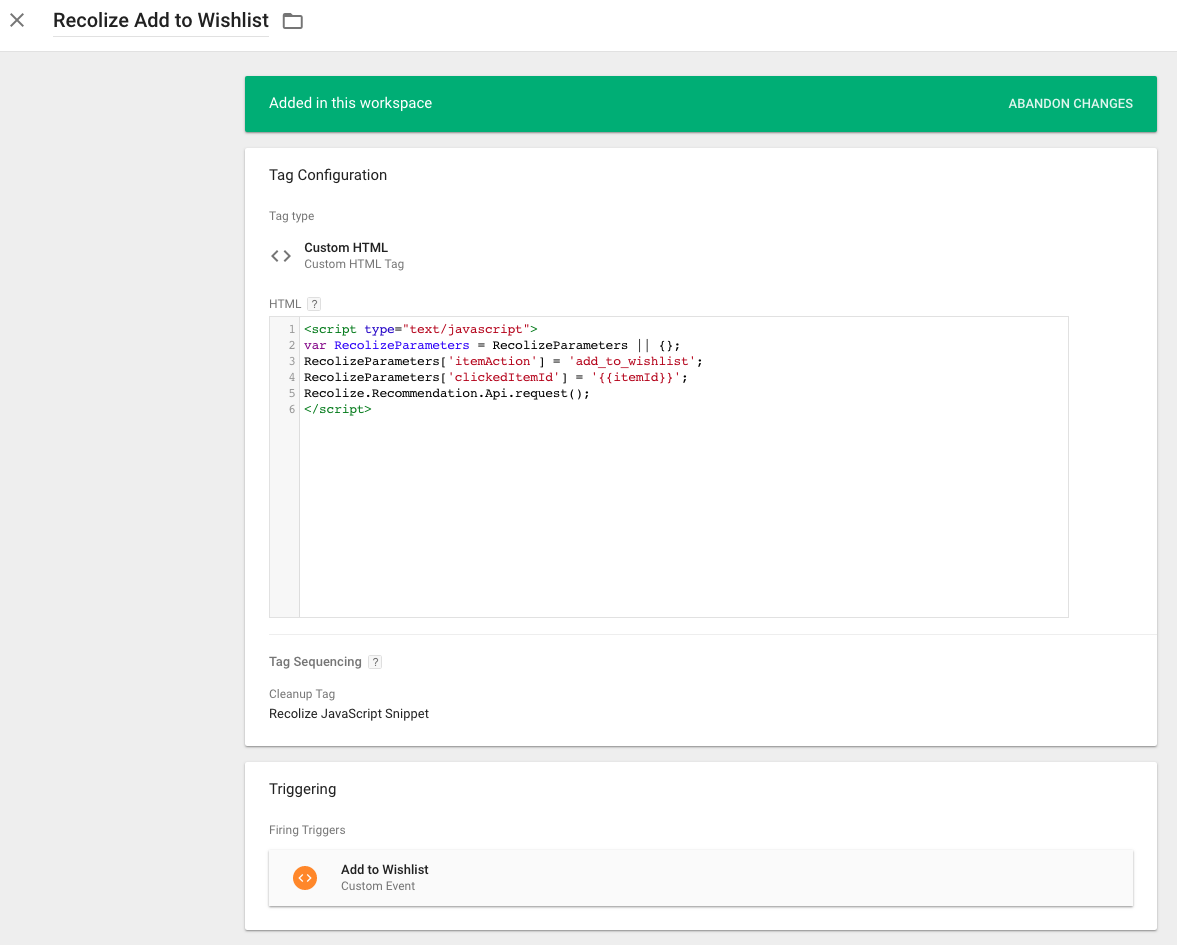
- Tag type: Custom HTML.
- Trigger: when an item is added to a wishlist, a notepad, a reminder list or a reading list.
- Variables: replace the variable {{itemId}} with your product or item ID of the item added. This must be the same item ID which you also use in the Recolize feed.
Advanced Integration Steps
Recolize has very powerful cross usage features:
- Cross-domain recommendations
- Cross-device recommendations
- Email Recommendations
To use all these features and make your Recolize recommendations sticky for the current user/customer, you can send an anonymized user/customer ID with every Recolize request after you can identify your user/customer e.g. when he is logged in.
<script type="text/javascript">
var RecolizeParameters = RecolizeParameters || {};
RecolizeParameters['User'] = RecolizeParameters['User'] || {};
RecolizeParameters['User']['id'] = '{{encryptedEmailAddress}}';
RecolizeParameters['User']['status'] = '{{userStatus}}'; // optional
RecolizeParameters['User']['group'] = '{{userGroup}}'; // optional
</script>
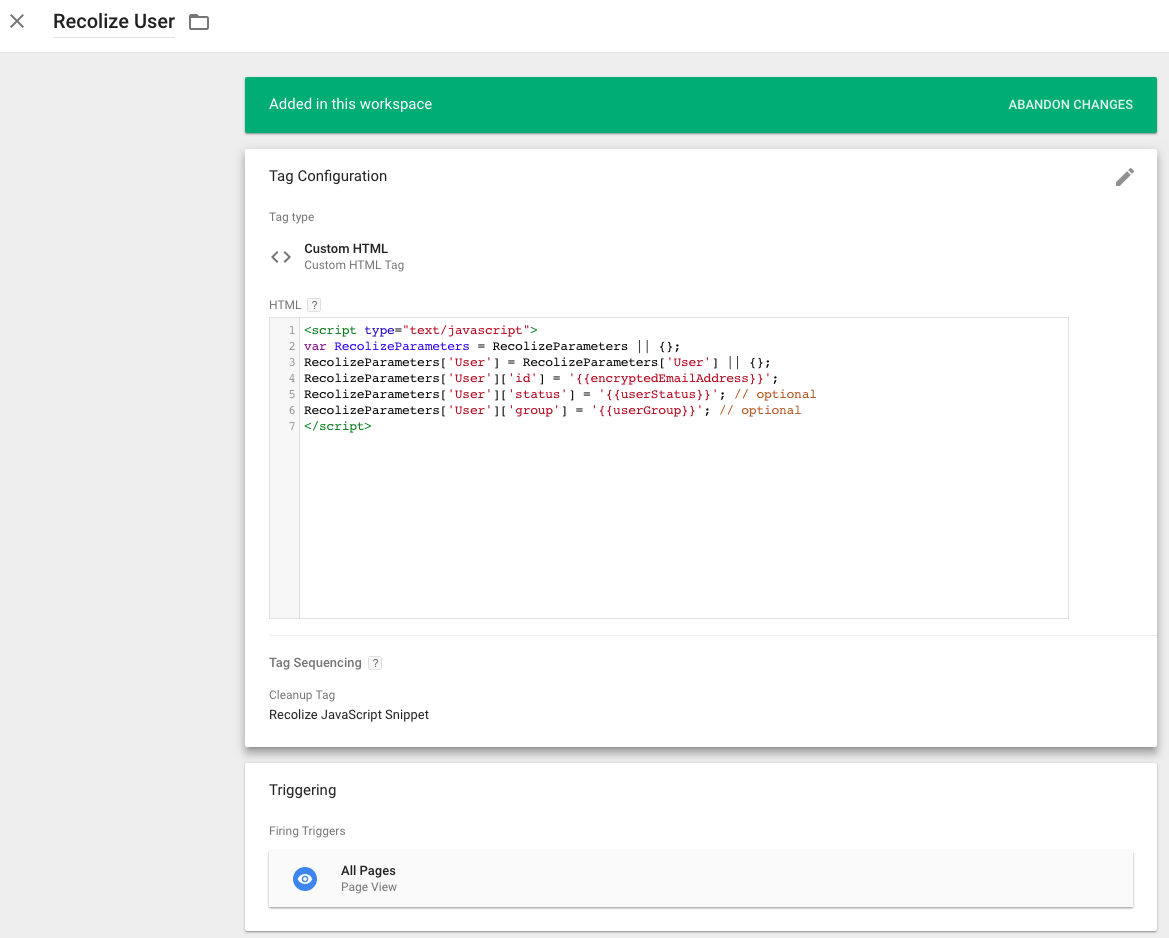
- Tag type: Custom HTML.
- Trigger: on all pages when a user/customer is logged in.
- Variables
- {{encryptedEmailAddress}}: the email address of the user/customer encrypted with SHA-1.
- {{userStatus}}: optional. Can be replaced by a user/customer status (e.g. “new_customer”, “returning_customer”).
- {{userGroup}}: optional. Can be replaced by a user/customer group
- Fire: before the global Recolize JavaScript Snippet.

